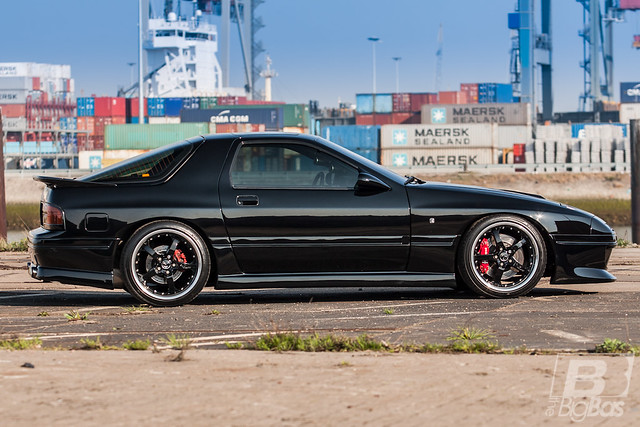
Ik ben Ferdi, beter bekend als Furb en ben al sinds 2005 bezig met Rotary, sinds ik mijn eerste auto kocht, een Mazda RX-7 FC.
volledig standaard gekocht en in 8 jaar tijd omgebouwd naar dit apparaat met 400pk
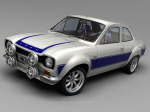
tijden en interesses veranderen, ik wilde iets nieuws, naja.. iets ouds
een Mazda 929 gekocht in Schotland voor erbij, maar 2 autos en een huis bleek teveel van het goede en er moest iets gebeuren.
vervolgens na lang denken en plannen de FC uit elkaar getrokken om wat geld vrij te maken en had zelf de motor en bak nodig voor mijn volgende project.
de 929 is identiek aan de Mazda RX-4, op de motor en aandrijflijn na, dus een ombouw naar RX-4 was voor mij dus een logische keus door mijn liefde voor de rotary.
de techniek is ook flink aangepakt, zo komt er een compleet '85 RX-7 onderstel onder, met grotere remmen voor en achter, sport dempers, versmalde achteras, verlaagde bladveren, kia sportage diff huis en een MX-5 sper differentieel.
hieronder een samenvatting van de afgelopen 2 jaar (ff copy paste, dus grotendeels in het engels)
before:


after:


started with the puzzle, so the painter could pick it up


work in progress


got hold of some awesome JDM goodness: SSR longchamps XR-4 wheels (for the RX-4, what's in a name
front 15x7,5 ET5


rear 15x7,5 ET-7


scored some NOS centercaps in Japan for my wheels


got some small amount of spare time that i spent on my dash unit.
i had done this before, but since i have a LHD car now, i had to do it all over.
but this time even a better version, because i kept the stock circuitboard intact so it will make it a lot easier to connect it to the stock wiring loom later on!


went to visit the paintshop today to check on the progress
progress is slow due to other work, and also the epoxy coating has made it a bit difficult.
the previous owner had put on somekind of boat coating which is very hard and takes a lot more time to sand. also had troubles with the filler, reacting with the coating.
it took some time to find the right materials and mixtures to make it all stick and stay on like it should.
slow but steady we are getting there....


finally some decent progress!
car is fully sanded and straight, ready for the basecoat!


meanwhile i've been busy preparing stuff
assembled the front struts with Tokico Blue shocks and T3 camberplates

made a tophat to support the weight of the car instead of the spherical bearing of the camberplate


made some roll-center adjusters, to compensate for the lowering

prepping the engine! not rebuilt yet, engine is fine at the moment so that's less troubleshooting later on


mounted the MSD blaster coils for the direct fire system

Modified the stock Speedo cable drive for an electronic pickup.
Calculated 2900 pulses per kilometer

Wired the entire gauges unit to work with the stock harness so it's plug and play!
Also modified the loom for extra sensors.
Even the illumination works with the stock dimmer switch.
Powered it up on a battery and calibrated the Speedo with my puls/km value.


Measured and drawn my own flanges for the intake manifold, cut on a waterjet.
Tip: drawn as a single flange and cutting them is cheaper

Started mockup and measurements for the intake manifold.
Intake runner length calculated according to port timing.
The only thing I had to guess was the angle of the engine in the car, I hope it's pretty close cause the runner lengths are spot on at the moment.


fitted an oil supply to the float bowls so that i get a bit of premix next to the housing injectors for better lubrication of the apex-seals. its also adjustable so i can prevent saturation of the float bowls

made a bracket for the throttle and choke cables

finally finished my throttle and choke linkages of the carb setup
once the manifold is done, i will do the final adjustments and tack everything in place
heated and moulded the stock oil supply lines to fit in the new situation

made the mechanical link between throttle and oil pump


mounted the throttle cable


choke cable can also be fitted


update! it's finally got some colour
first the doors in the basecoat


the floors sprayed with a couple of layers of bodycoat for protection and noise reduction


and then painted the interior


deze laatste update was van volgende week.
hopelijk is de complete auto nog voor het einde van het jaar klaar en kan ik gaan beginnen met opbouwen
to be continued...