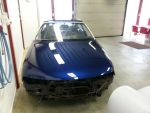
Dank voor de morele ondersteuning.. Ik had gehoopt gisteren al klaar te zijn met de voorwielophanging en het subframe. Jammergenoeg loopt het nooit zo als je wilt. Ben niet eens op 30% van de voorkant, schat ik zo. Een deel van de ophaning wil ook niet eens uit elkaar. Maar een ijzerzaag zal vanavond wonderen doen. De revisie van de bovenste ophangings-armen kan ik gelukkig overslaan, aangezien de vorige eigenaar riant is geweest met de vetspuit!
Ik hoop de voorkant vanavond in elkaar te krijgen, maar we zullen zien, ik zit nog met de uitdaging van de Spax ophanging, daar zitten drie brackets bij, maar ik heb geen flauw idee hoe het in elkaar moet.
Updatje: Net wat gevonden:

Fitting (Front)
People familiar with the Mini suspension arrangements should only carry out fitting.
The general fitting procedure is as follows:
1. Remove the shock absorber and suspension cone rubber
2. Wet suspension models: remove all the fluid and pressure from the system. It is best to remove the entire hydro bags from the system; although not necessary
3. Remove upper shock mount on dry suspension models.
4. Remove the top suspension arm ball joint and nut.
5. Loosely fit new upper damper bracket on original fixing using ¼ UNK bolts supplied (there are two additional fixing holes provided in this bracket for increased strength if required)
6. Loosely fit the top of the cradle over the top arm ball joint with the 7/16 UNF nyloc nut.
7. Loosely fit the two side plates using the 3/8 and 5/16 UNF bolts supplied, making sure the double side plates is towards the front of the car and is handed accordingly (welded spacer facing towards the back of the car)
8. With the 3/8 UNF damper bolt loosely in position through the side plates tighten the 7/16 UNF nyloc nut and the 5/16 UNF bolt that runs through the suspension arm to the correct torque (see below)
9. Remove the 3/8 UNF damper bolt and loosely fit the coil-over damper unit in position; re-fit the 3/8 UNF damper bolt with sufficient washers to space the unit on the bottom mount. Mount the unit vertically with the ½ UNF upper damper bolt using the spacer tubes provided to ensure no sideways movement of the unit. Adjustment may need to be made to the upper tubes and lower washers spacers as necessary to ensure a vertically mounted unit.
10. Tighten bolts to torque settings provided.
¼ UNF damper bracket bolts- manufacturers recommendations
3/8 UNF side plate through bolts 35lbf/ft.
5/16 UNF bottom damper mount through bolt 30lbf/ft.
7/16 UNF ball joint nut manufactures recommendations.
½ UNF upper damper mount through bolt- 40lbf/ft.
11.When fully assembled check clearances of wheels and tires.
Robert